Skip to Main Content Skip to Footer Content

How to Remove a Kitchen Backsplash

A kitchen backsplash may need to be removed; unfortunately, removing a kitchen backsplash can be a daunting task that leads to damaged drywall, if not properly executed.

The pros at local Mr. Handyman are ready to give you the tips and tricks necessary to properly remove your kitchen backsplash without damaging your drywall.

If at any time you feel uncomfortable removing your kitchen backsplash or if you feel like you may be damaging your drywall, call Mr. Handyman or schedule an appointment online for full kitchen backsplash removal services.

How to Remove a Kitchen Backsplash
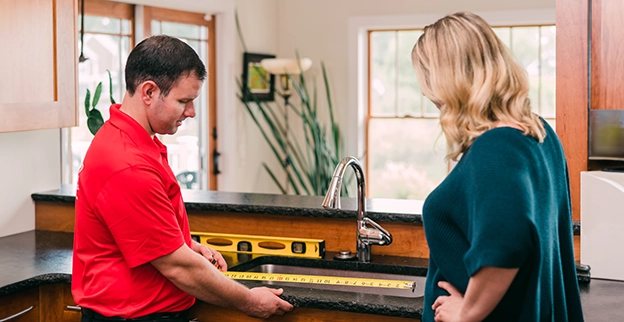
A person measures a countertop, while a woman observes attentively in a bright kitchen.

Let Us Call You

Service Type

By checking this box, I agree to opt in to receive automated SMS and/or MMS messages from Mr. Handyman, a Neighborly company, and its franchisees to the provided mobile number(s). Messages & data rates may apply. View Terms and Privacy Policy. Reply STOP to opt out of future messages. [US Disclaimer]

By entering your email address, you agree to receive emails about services, updates or promotions, and you agree to the Terms and Privacy Policy. You may unsubscribe at any time.

Test Your Tile

Before you start chipping away with your chisel and hammer, check how the tile is secured to the wall. Ideally, you will encounter mortar and grout. Check this by finding a tile that is behind an appliance or that is not easily noticed. Carefully remove it from the wall to see how it has been secured. Once you confirm it is mortar and grout, continue the backsplash removal process outlined below.

If there is no mortar consider yourself lucky. Some imitation “tile” is installed in sheets with adhesive backing. If this is the case, simply tear the sheets of the wall. Be careful not to damage the wall if you’re not installing a new backsplash.

Collect Your Tools

To remove your tiles, you will need:

  • a chisel
  • hammer
  • putty knife with a stiff blade
  • stud finder
  • sanding block with 120-grit sandpaper
  • spackle or repair putty

You may not need the sanding block or repair putty depending on how much damage is left from pulling the tiles off your wall.

You will also need to cover your counters and sink with cardboard or plastic to ensure you do not damage your countertops or get any pieces of tile in your garbage disposal.

Carefully Remove Tiles

First, use the stud finder to locate a stud and mark this as your starting point. If you start with a tile situated over a stud, you have a lower chance of pulling drywall off. Next, use your chisel and hammer to carefully remove the tiles from the wall. Use the end of the chisel and hammer to pry off the tiles between the backer board and the tile. Once you clear a starting section, use the putty knife and hammer to get behind the pieces of tile. Depending on the tile and mortar, you may need to use the chisel for this entire process.

Repair the Walls

After removing the tiles, you may have some excess mortar or grout on your wall. You may also spot some damaged drywall. This is when the sanding block and spackle come in handy. Fill in any damaged areas with the spackle, allow to fully dry, and then sand the area. If you’re applying a new backsplash you can skip any cosmetic repairs, but will need to patch any large holes (bigger than a tennis ball).
Your Local Backsplash Removal Pros


If you need backsplash removal, installation or repair services, Mr. Handyman is ready to help. Call today or request service online.


Contact Mr. Handyman Today.


All Mr. Handyman franchises are locally owned and operated and may offer fewer or more services than those listed here. To learn more about kitchen backsplash removal offered in your area, contact your local Mr. Handyman for details or a customized on-site assessment.

Your Local Backsplash Removal Pros

Modern kitchen featuring dark cabinets.
Service You Can Trust!

Let us know how we can help you today.

Our Professional Handyman Services

At Mr. Handyman, our goal is to bring your ideas to life. We offer comprehensive handyman services to meet all your needs. Some of our most popular services include the following:

Customer Testimonials: Hear What Our Clients Say!

Read More Testimonials
  • Kaitlin Clifford

    Will was such a pleasure to have back to hang my new light fixtures. He is always polite, incredibly trustworthy, and always on time.

    Kaitlin Clifford
    4.8/5
  • Mike Mcelligott

    Called for issues with 3 different doors. First one had a sagging top hinge. Tech unscrewed the hinge, put wood filler in and screwed them back. 2nd was evening out a closet door so it would close better. Final door has sort of a weird striker and will blow open during storms. Was unable to get this last one fixed. I opted not to move forward on this last one as it would have required an extra $80 for a trip to Lowes. My tech was knowledgeable, professional, and friendly. 2/3 of my doors got fixed. And I was aware the last one probably wouldn't be fixed on short notice. Due to its weird nature. Only issue I had was COST. Spent 45 minutes fixing my two doors. Originally quoted over $400 as worst case. He did revise it down to $375. So we're looking at labor cost of $400/hr give or take. My job had no materials. Mr Handyman also installed my vanity in the bathroom a year or so ago. Not sure if that first review is still up. These guys stand by their work. They warranty the work out for one year in case there are problems. If there are issues they come out pretty quick. Everyone I've dealt with has been professional, friendly, and reliable. Just know you will likely be paying 2-3x more per labor hour than what an independent contractor would charge. UPDATE: On June 26th one of their reps called me. Acknowledged price may have been a bit high for the short amount of time spent. And said they would meet me in the middle. When they can they would see if someone can stop by when they are in the area. And fix the striker on that last door. If this last door gets fixed, I'm more at peace with the $300-400 price.

    Mike Mcelligott
    4.8/5
  • Bink Ster

    The technician did a great job and took pride in his work

    Bink Ster
    4.8/5
  • Rebecca Rainey

    Started off late but when he arrived he went straight to work. Was very careful not to make any more of a mess than absolutely necessary!!! We had him instal a stove top where he needed to cut the granite to fit the new stovetop and he did a great job!!! Even cleaning up what little mess that was left. Very satisfied!!!!

    Rebecca Rainey
    4.8/5
  • Gary Decker

    Was on time and performed requested services.

    Gary Decker
    4.8/5
Neighborly Done Right Promise Logo

The Neighborly Done Right Promise® delivered by Mr. Handyman®, a proud Neighborly company.

Helpful Resources

  • Mr. Handyman repairing damaged ceiling.

    Who to Call for a Water Leak in Your Ceiling & What to Do In the Meantime

    Installing a sump pump in your home or business is a crucial step to protecting your property from flooding and water damage.

    May 15 2025
  • Open wall with wooden beams.

    Wheelchair Ramp Cost: Factors, Materials, & Installation Pricing Explained

    Installing a wheelchair ramp is a crucial step in improving accessibility, whether for residential or commercial purposes

    May 15 2025
  • Technician in a red uniform installing a water heater.

    Who Installs Water Heaters? What You Need to Know Before Hiring a Professional

    When it comes to replacing a water heater or installing a new one, many homeowners ask the same question: who installs water heaters, and do I really need to hire a professional?

    May 07 2025

Kitchen Backsplash Removal FAQs

Mr. Handyman has been helping homeowners repair, maintain, and enhance their spaces for over 25 years! We are the one-stop solution for everything on your to-do list. This includes answering your questions about home repairs, maintenance, and improvements. Here are answers to some of your most frequently asked questions about kitchen backsplash removal.

  • There are several reasons you may want to learn how to remove a tile backsplash in your kitchen. The backsplash could be damaged or outdated, or you could be tackling a complete remodel. Regardless of why that backsplash has to go, learning how to remove a backsplash with the least effort and damage requires patience and the right tools.

    • Safety glasses to protect your eyes from tile and grout debris.
    • Thick gloves to protect your hands from shards and sharp edges.
    • Vacuum cleaner to keep the work area free of debris during the removal.
    • Hammer and pry bar for removing tiles or other kitchen backsplash material.
    • Putty knife to get into tight spots where the pry bar may cause damage.
    • Caulk removal tool to remove caulk without causing damage to counters and cabinets.
    • Screwdriver to remove switch plates and outlet covers.

    If you're learning how to remove a tile backsplash and are experienced with power tools, consider using a grinder or Dremel with a grout removal blade. You don't need to remove all the grout, just enough to break the bond between tiles. Scoring the grout makes removing a tile backsplash much easier and with minimal damage.

Service You Can Trust!

Let us know how we can help you today.

Join Our Team

Mr. Handyman is hiring. For 25+ years, we've consistently hired reliable, customer service-focused employees who are both knowledgeable and skilled.

Start your career with us today. We offer exciting opportunities for growth and success in an important space